

Introduction
Microsoft Word or MS Word (often called Word) is a graphical word processing program that users can type with. It is made by the computer company Microsoft. Its purpose is to allow users to type and save documents. Similar to other word processors, it has helpful tools to make documents.
Basics
Open Word
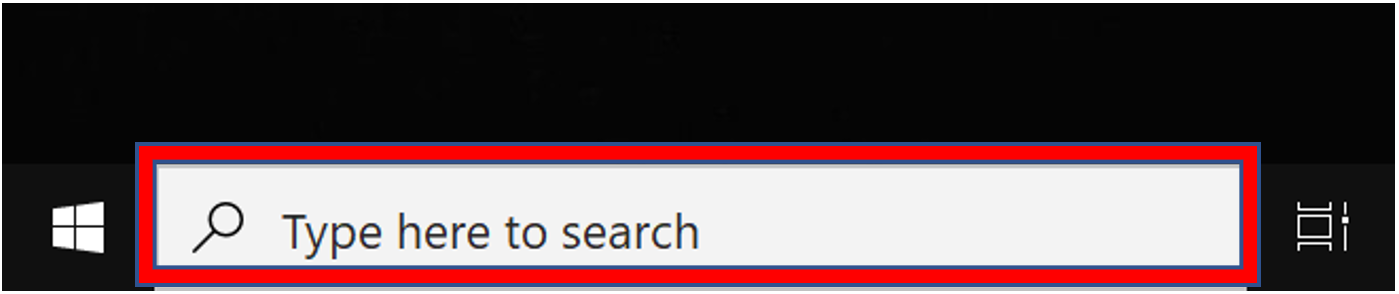
Step 1:
Click on Search button and type Word.
Step 2:
Click on Open button.

OR
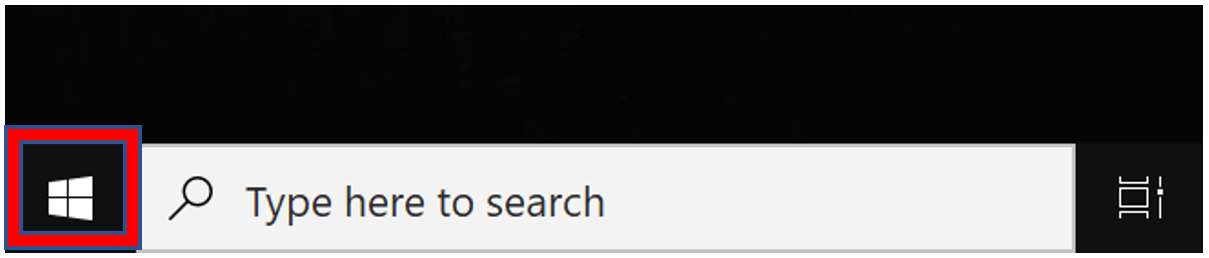
Step 1:
Click on START menu.
Step 2:
Select and Click on Word from the window.

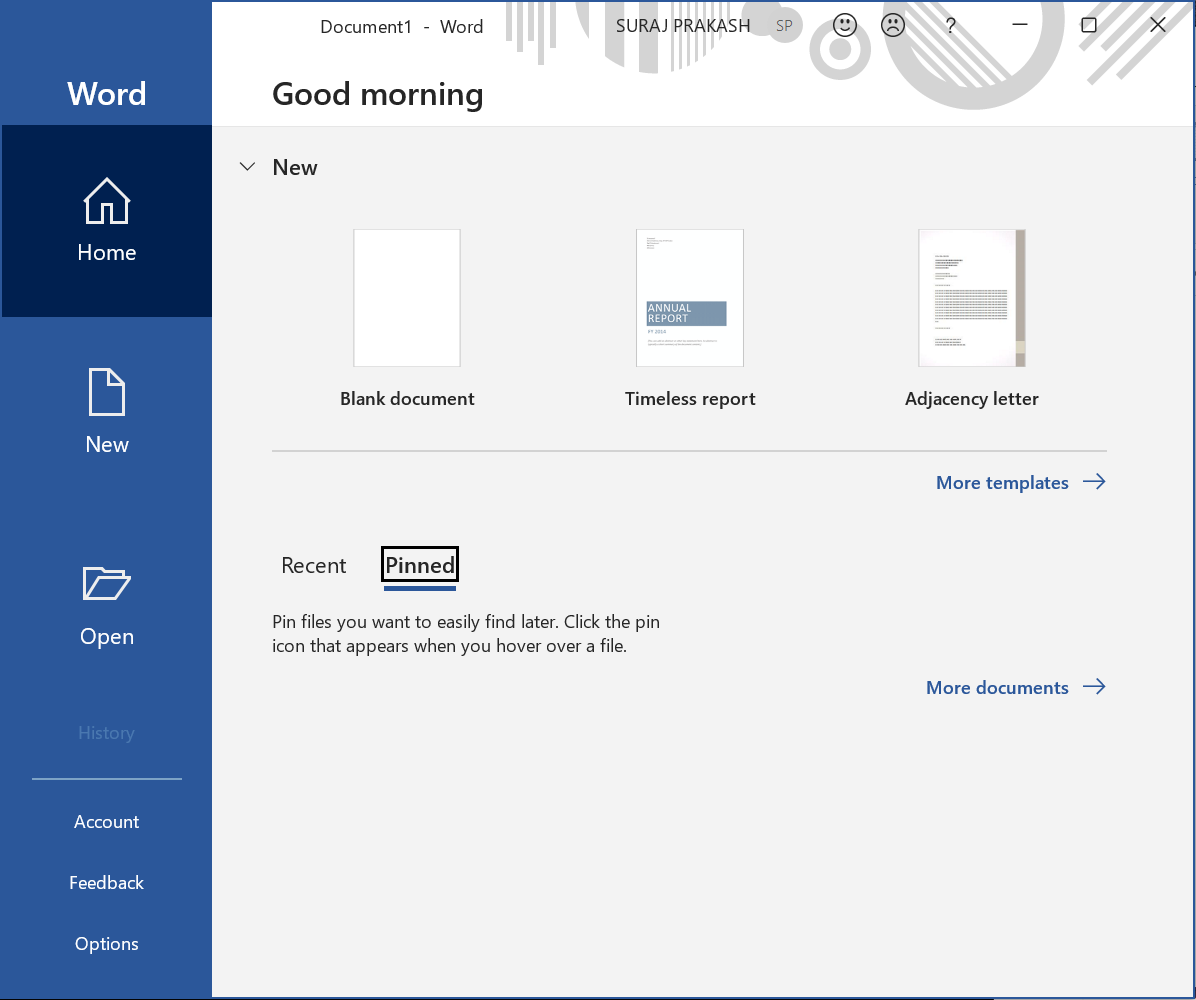
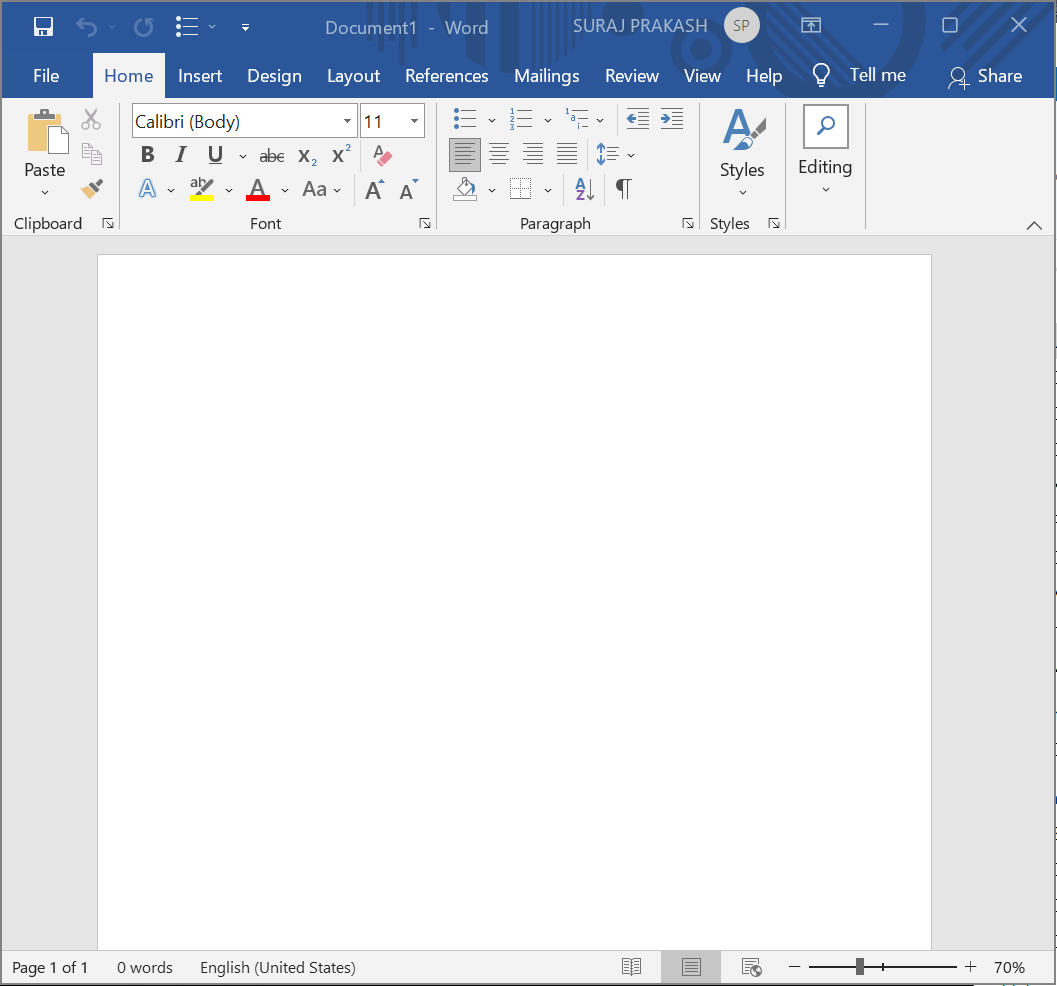
After clicking open, this window will come.
Creating Word
Whenever you start working on a new project in word, you should create a new document.
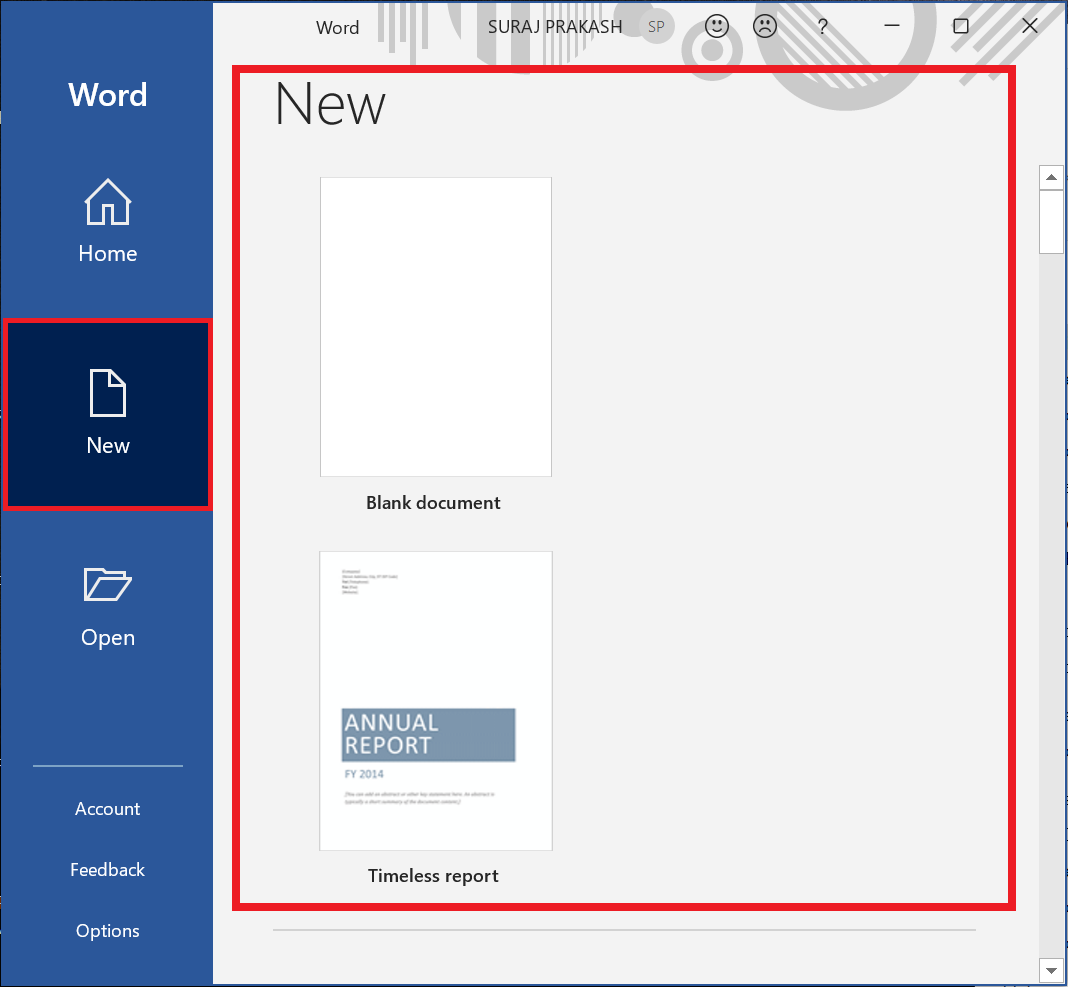
Create a new blank document:
- Open word
- Then click on New and from that rectangular window, Select a blank word file or Template .
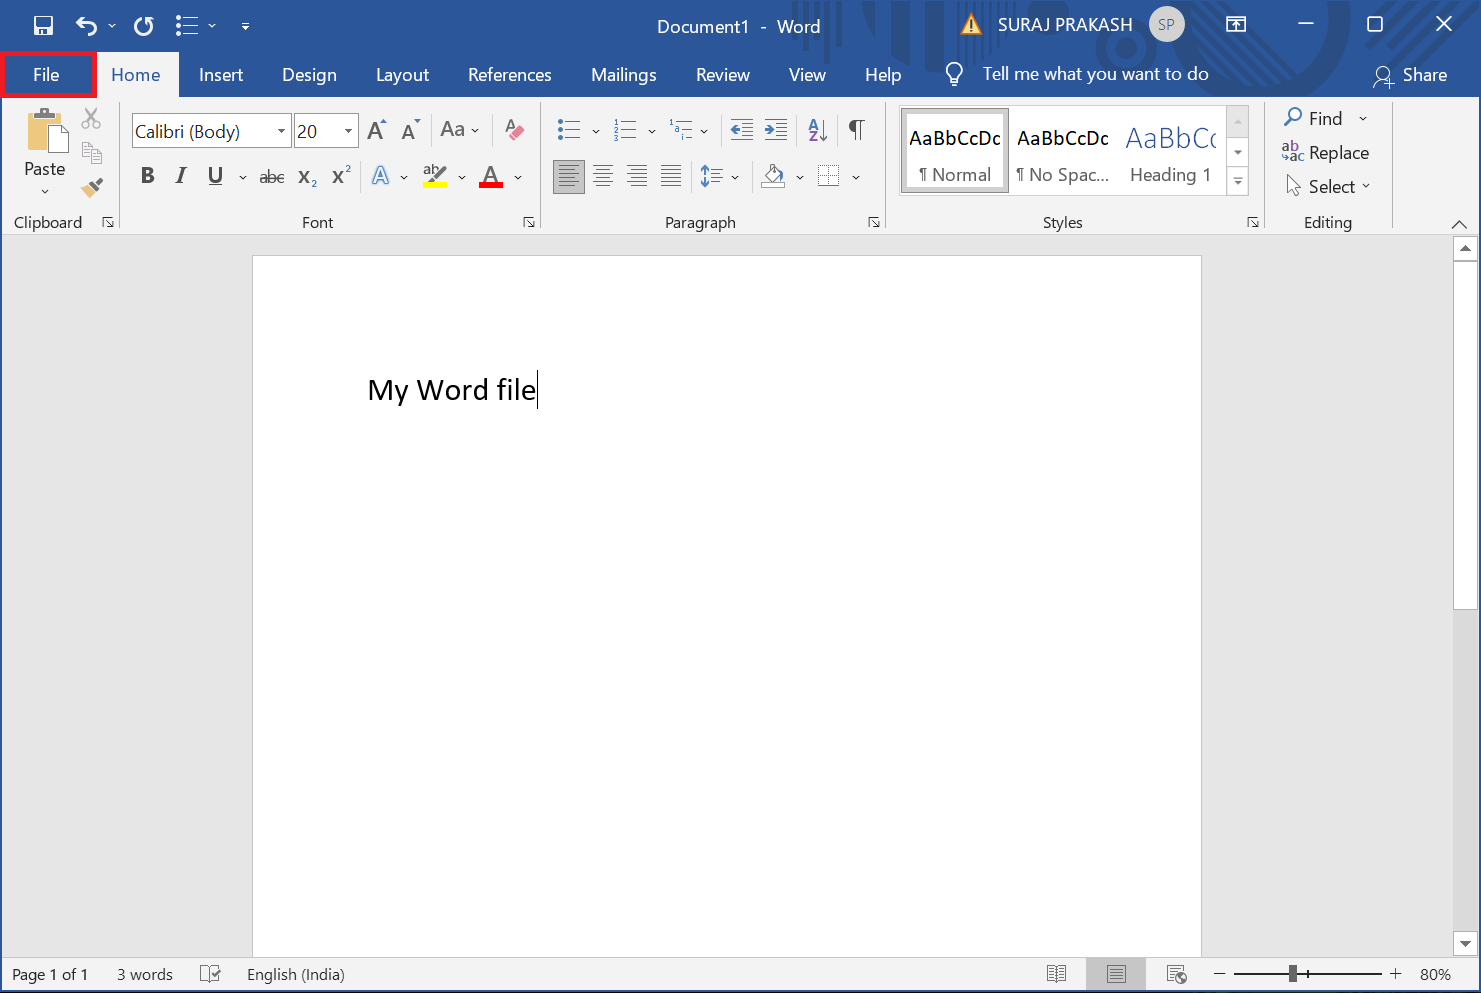
After opening, the Word file will look like this.
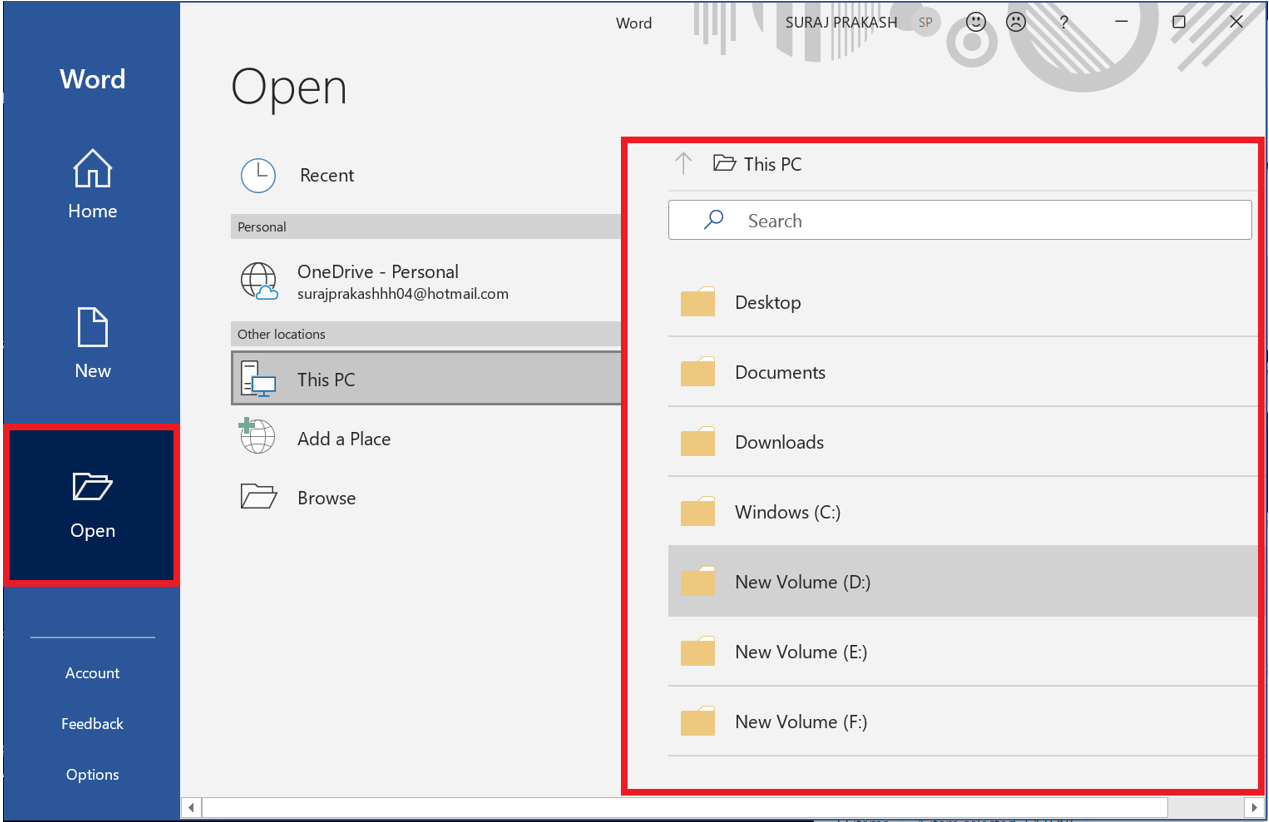
Open an existing word file.
Click on Open and from that rectangular re window, select the existing word file location.
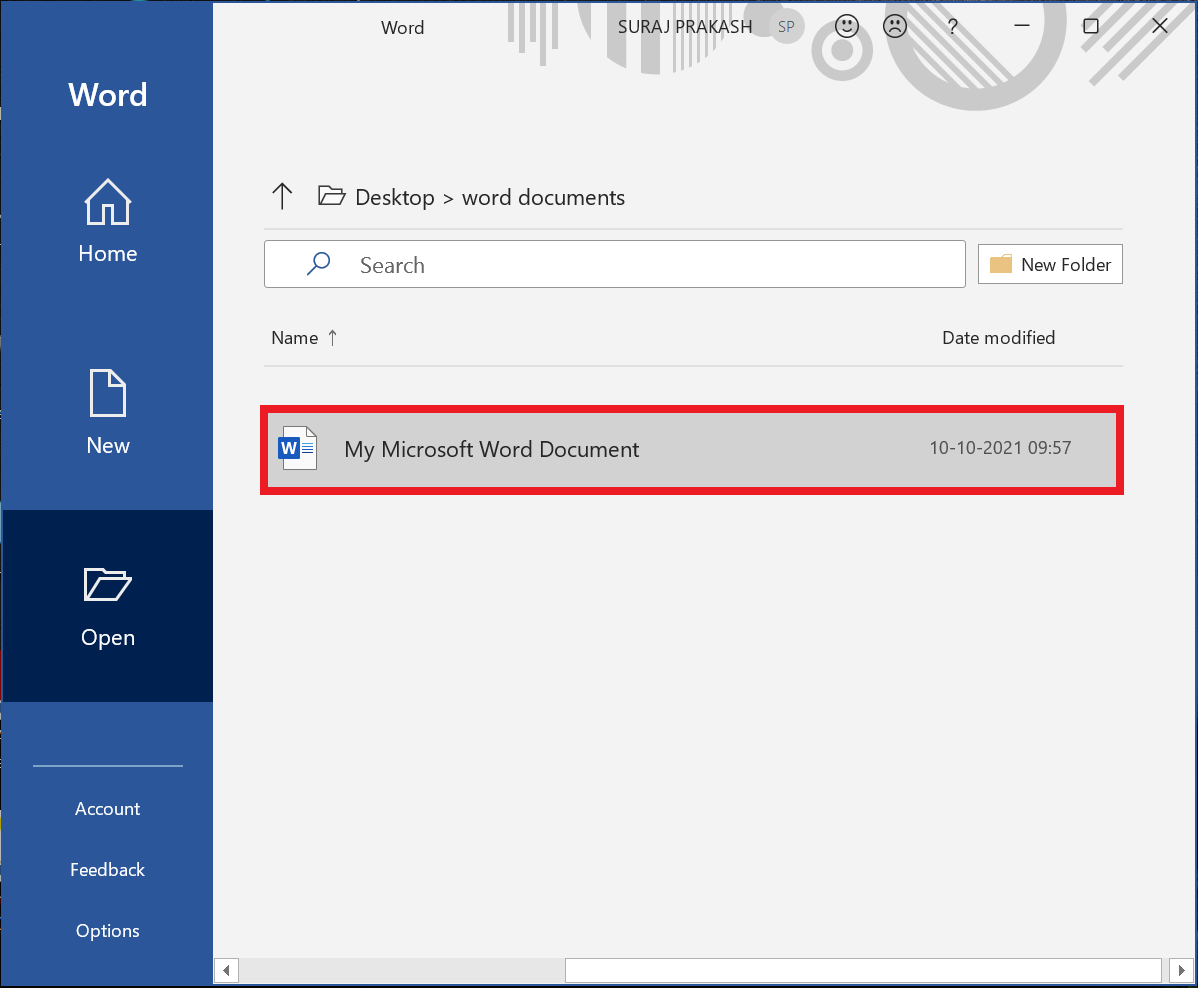
After that Click on the Word File
Word Basics
Ribbon
The Ribbon is a user interface element which was introduced by Microsoft in Microsoft Office 2007. It is located below the Quick Access Toolbar and the Title Bar. It comprises seven tabs; Home, Insert, Page layout, References, Mailing, Review and View. Each tab has specific groups of related commands. It gives you quick access to the commonly used commands that you need to complete a task.

It contains
1. Home tab
Home tab has five groups… Clipboard, Font, Paragraph, Styles and Editing. It helps you change document settings like font size, adding bullets, adjusting styles and many other common features. It also helps you to return to the home section of the document.

2. Insert tab
Insert tab is used to insert or add extra features in your document. It is used to add tables, pictures, clip art, shapes, page number, etc. The Insert tab has ten groups… Pages, Tables, Illustrations, add-ins, media, Links, comments, Header & Footer, Text and Symbols.

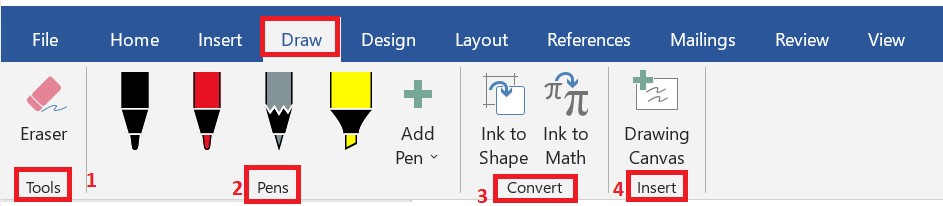
3. Draw tab
The draw tab in the Word can help you add notes, create shapes, edit text, and more. It contains tools, pens, convert and insert.
4. Design tab
The Design tab lets you set what the chart looks like and what data appears in it. Design tab has two groups… document Formatting and Page Background.

5. Layout tab
Layout tab is used to control the look and feel of your document. The Layout tab has three groups… Page Setup, Paragraph and Arrange.

6. Refrences tab
References tab helps you to enter document sources, citations, bibliography commands, etc… The References tab has seven groups… Table of Contents, Footnotes, research, Citations & Bibliography, Captions, Index and Table of Authorities.

7. Mailing's tab
Mailing’s tab allows you merge emails, writing and inserting different fields, preview results and convert a file into a PDF format. The Mailings tab has five groups… Create, Start Mail Merge, Write & Insert Fields, Preview Results and Finish.

8. Review tab
Review tab helps you proofread your content, to add or remove comments, track changes, etc. The Review tab has ten group… Proofing, speech, accessibility, language, Comments, Tracking, Changes, Compare, Protect and ink.

9. View tab
View tab allows you to switch between Single Page and Two Page views. It also enables you to control various layout tools like boundaries, guides, rulers. The View tab has eight groups… Views, immersive, page movement, Show/Hide, Zoom, Window, Macros and SharePoint.

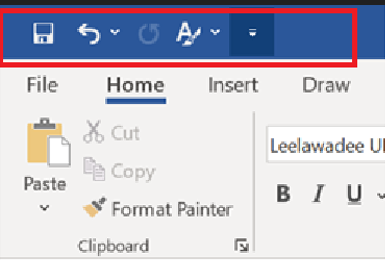
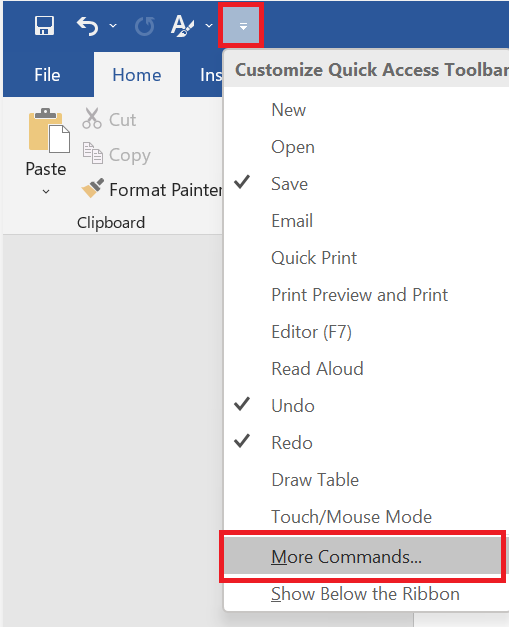
Quick Acess Toolbar
The quick access toolbar lets you access common commands. It shows the save, undo redo commands and you can also add commands later.
Saving Word
Step 1:
Click on File menu on the top left of the word window.
Step 2:
Click on save or save as button.
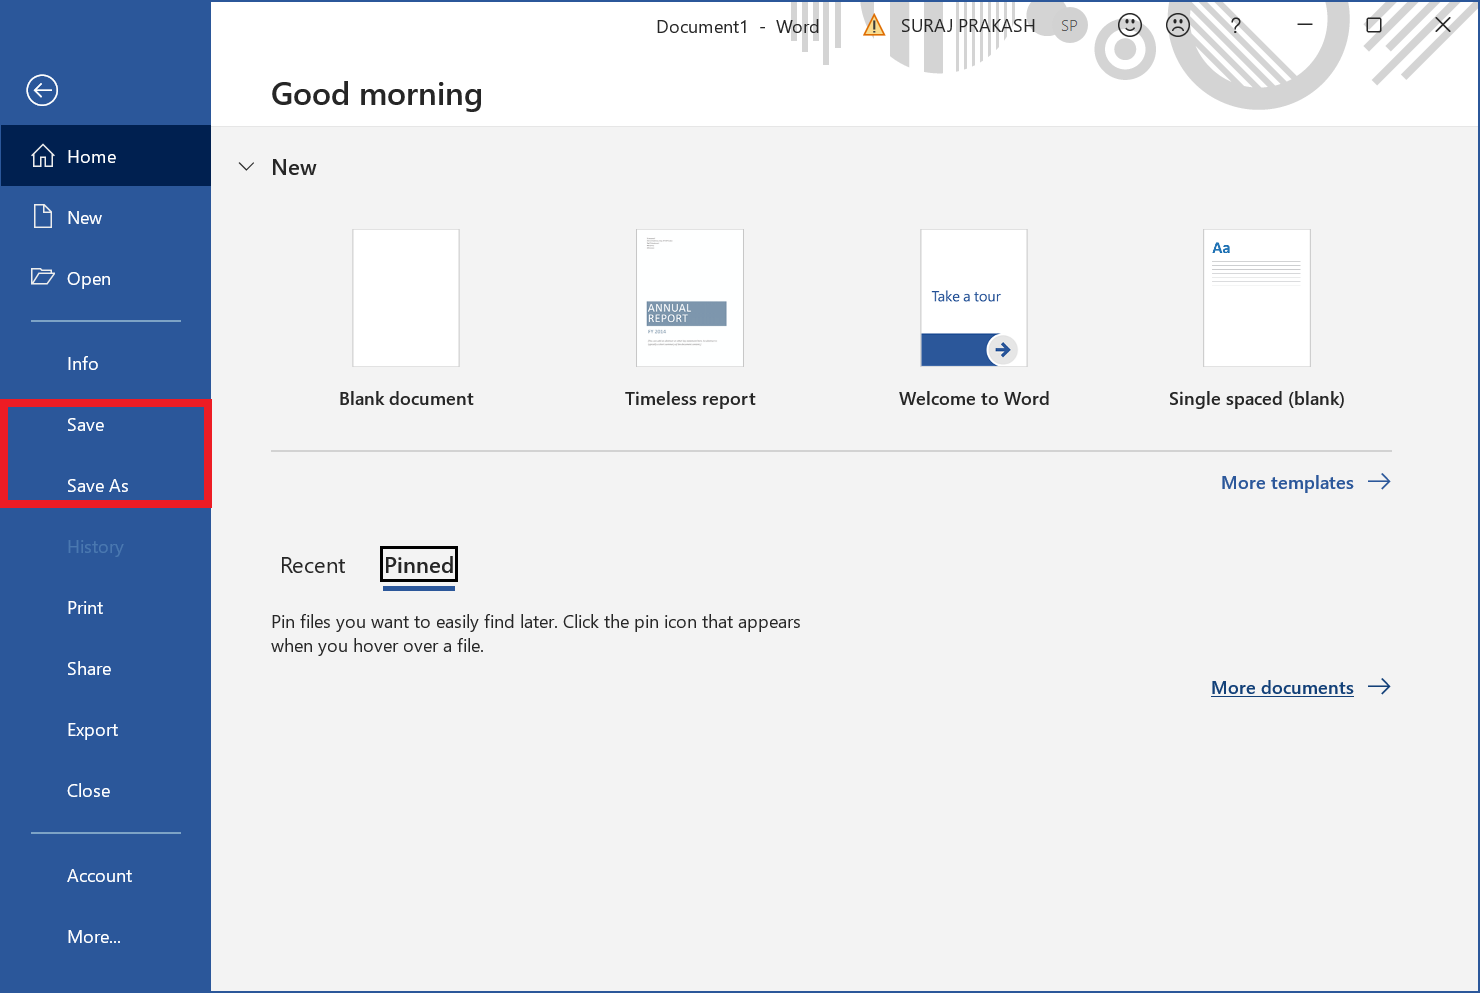
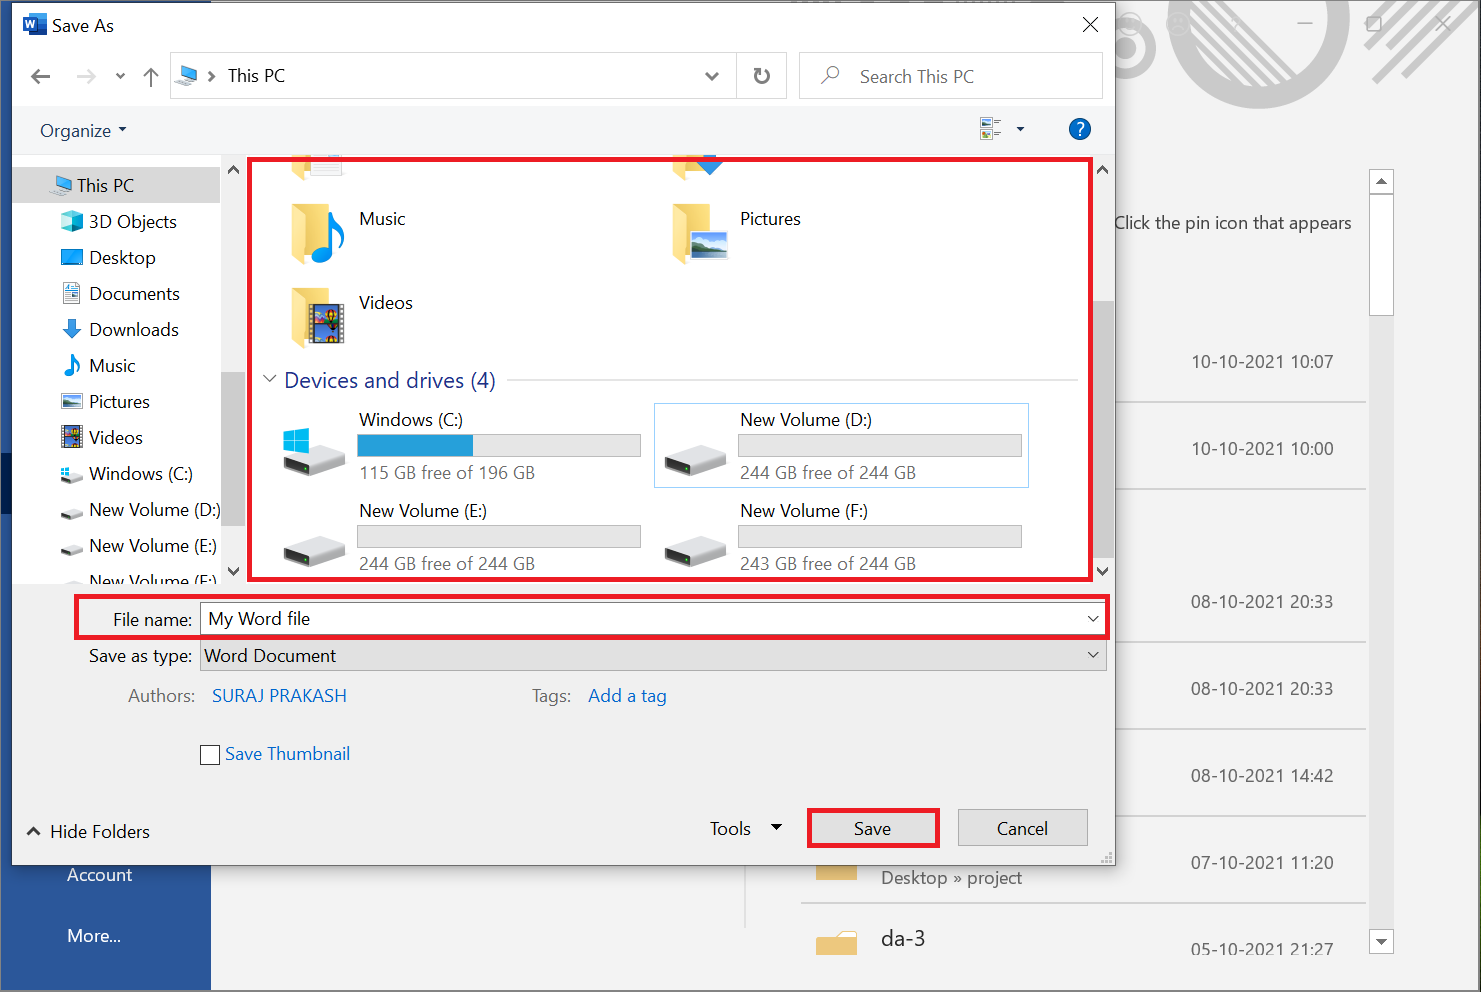
Step 3:
- Select the location from the first rectangular window for the word file to be saved.
- Type the word file name in second rectangular window.
- Finally Click on save button.
Text
Text Basics
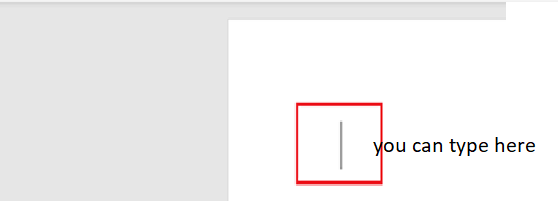
How to add text
The insertion point is the blinking vertical line in your document. It indicates where you can enter text on the page.
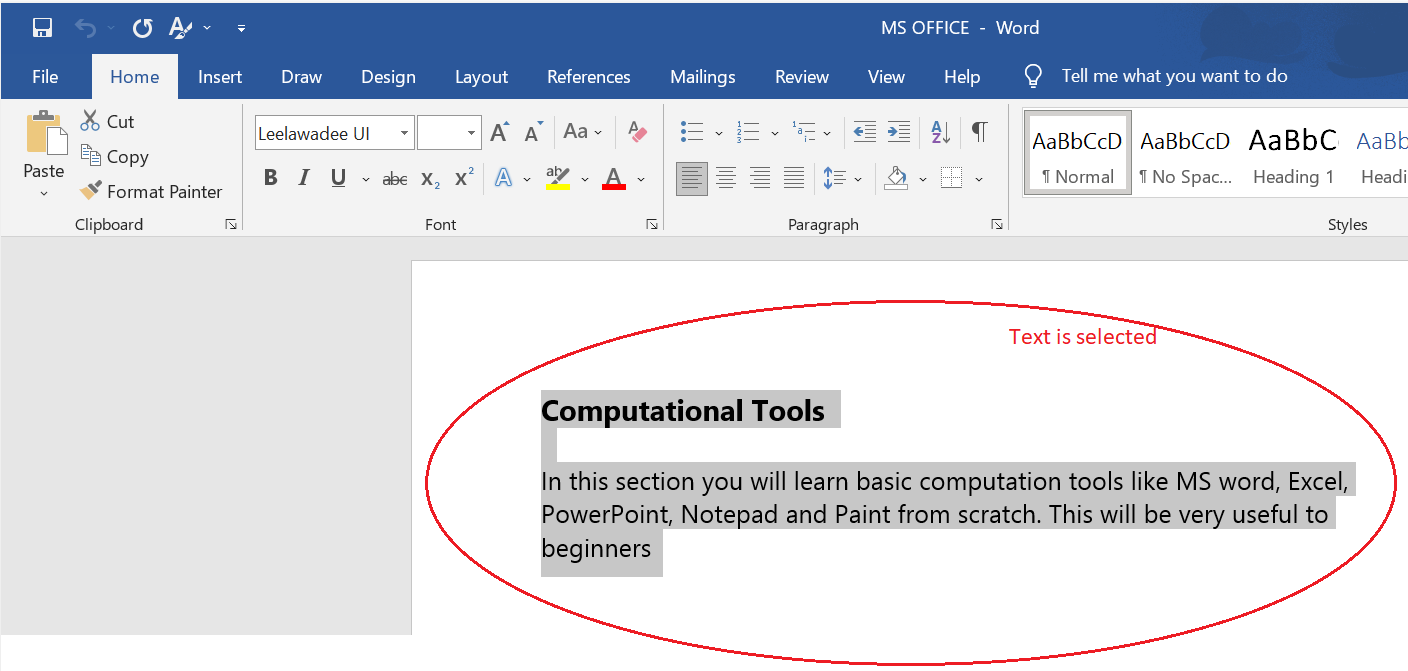
How to Select Text
Place the cursor next to the text then left click the mouse and holding it down move it over the text then release it. The text will be selected.
How to Delete Text
You can easily delete the text in Word including characters, paragraphs or all of the content of your document. You can delete any text by selecting the text and by pressing backspace key.
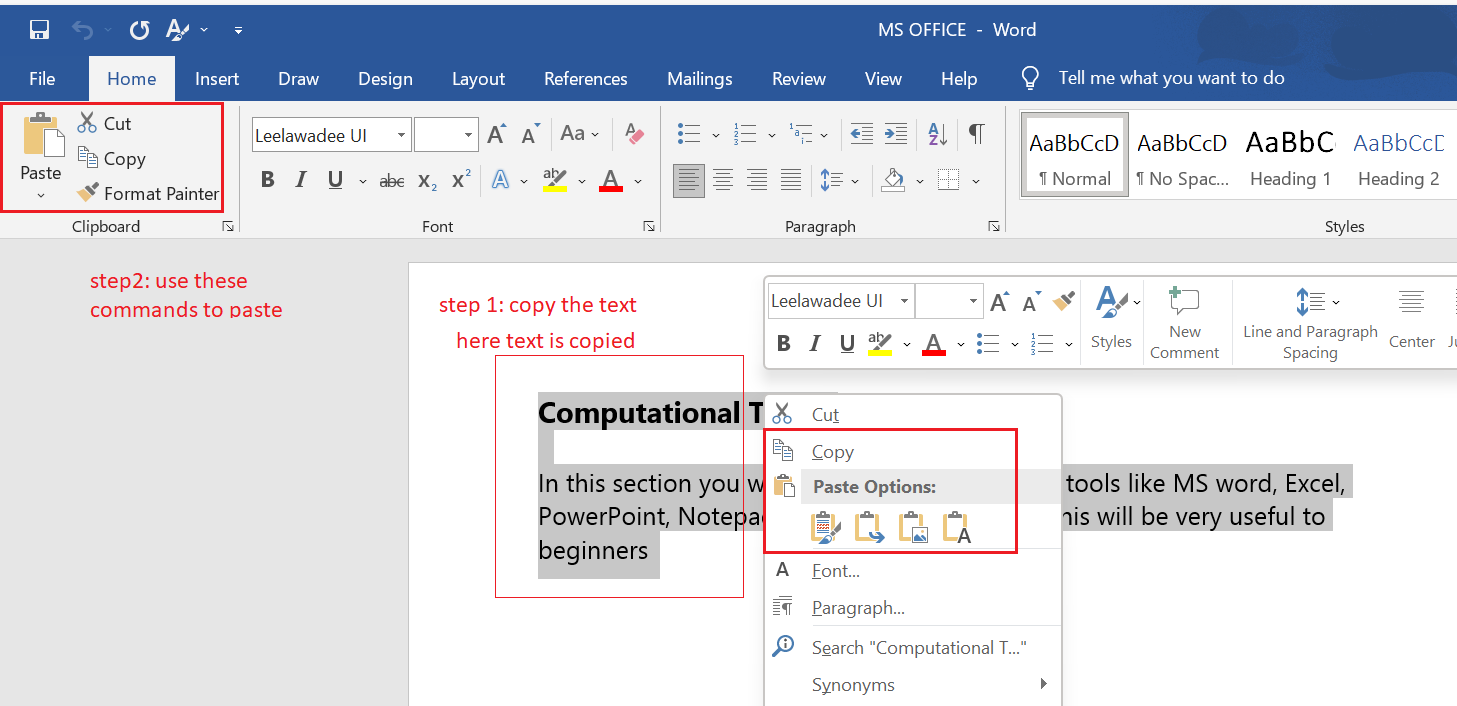
How to Copy and Paste Text
You can copy and paste text by..
- Select the text you want to copy.
- Select the Home tab and click the Copy command
- Place the cursor where you want to paste the text
- Click the Paste command in home tab
Text Formats
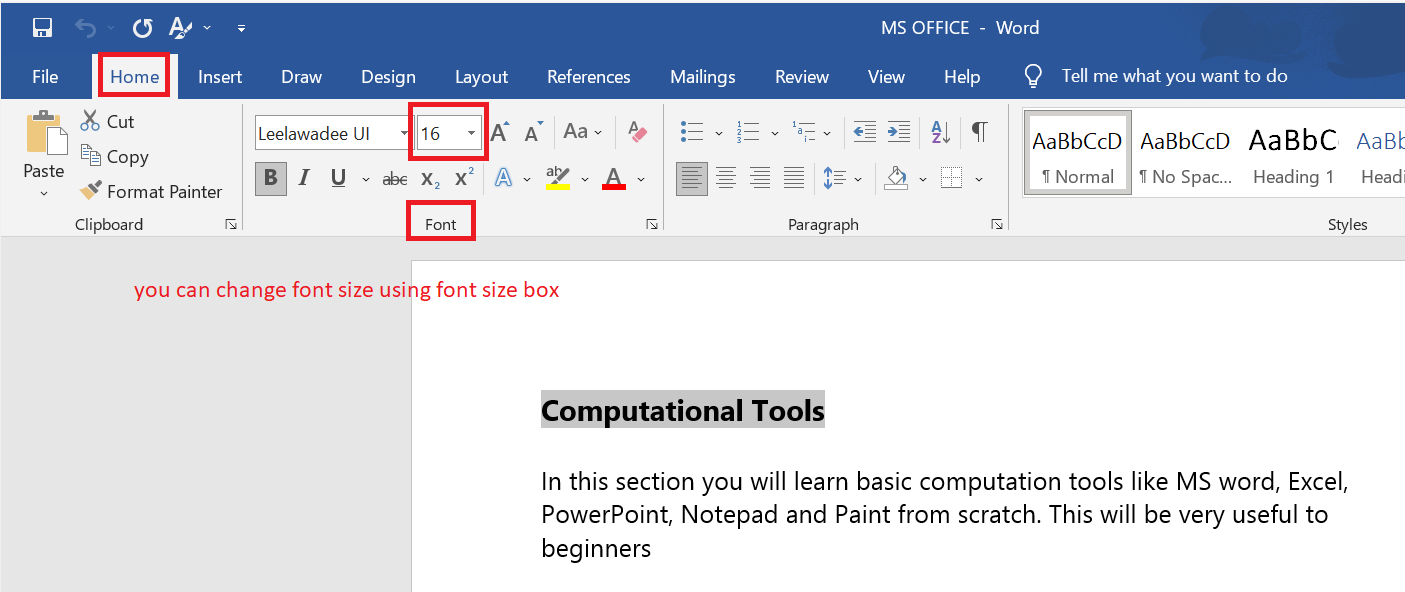
How to Change Font Size
You can change the font size of your text in the document by…
- In Home tab you will find the Font group.
- In Font group click the drop-down arrow next to font size box.
- Font size menu appears
- Select the desired font size with a left click
- Select the text and click the increase or decrease font size buttons
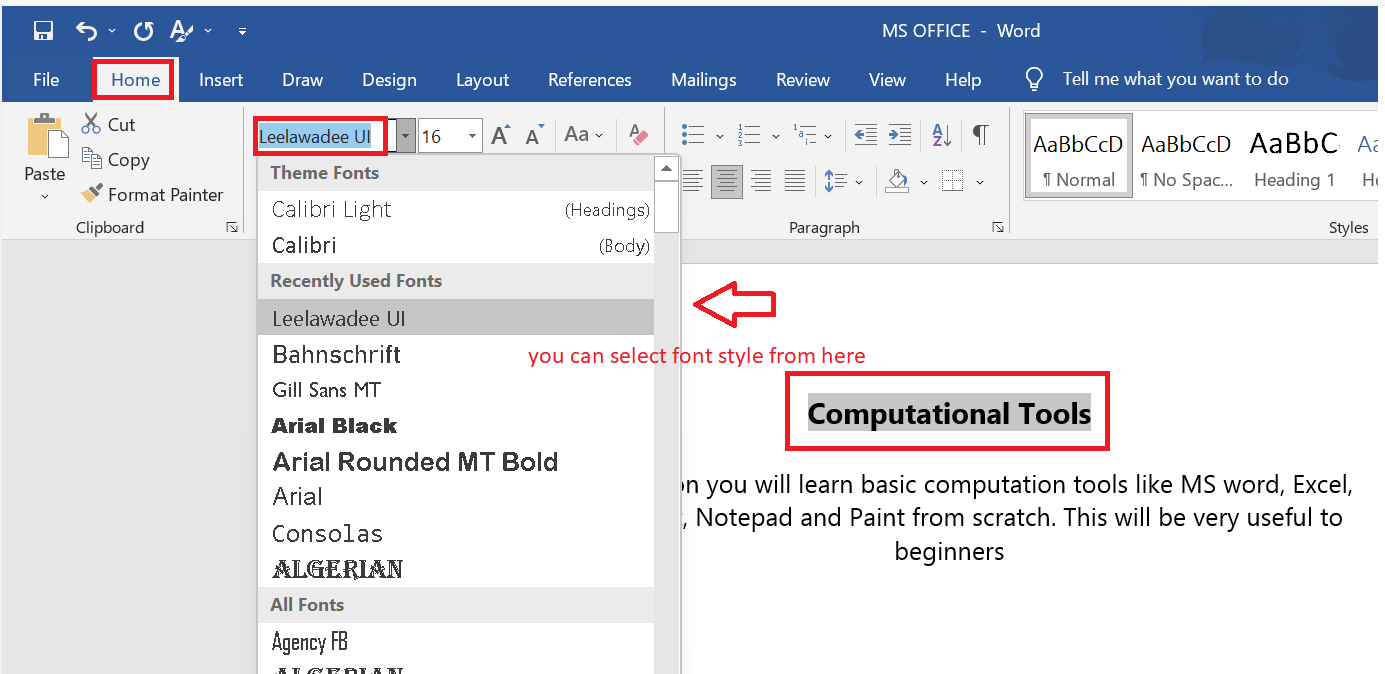
How to Change Font Style
You can change the font style of your text in the document by…
- Select the text you want to modify
- Select the Home tab and locate the Font group
- Click the drop-down arrow next to font style box
- Font style menu appears
- With a left click select the desired font style
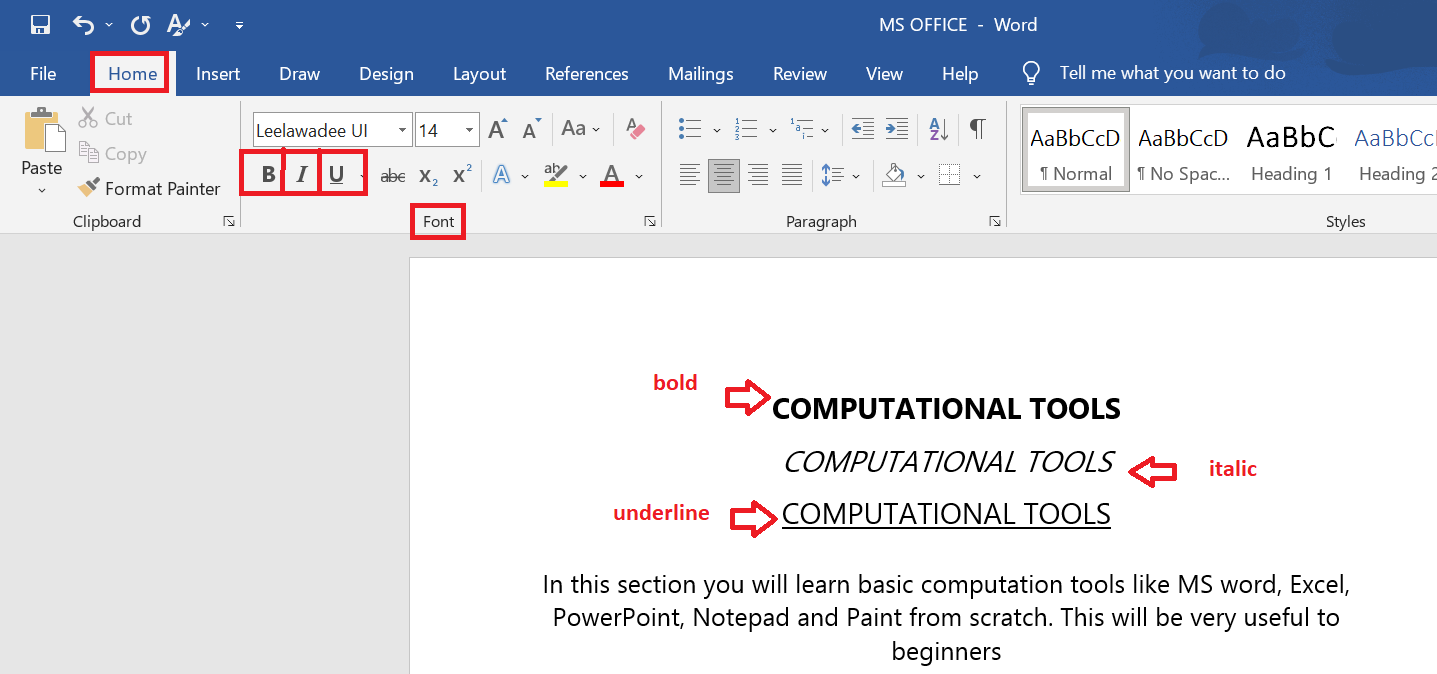
- If you want to change the font to bold or italic, click the 'B' or 'I' icons on the format bar.
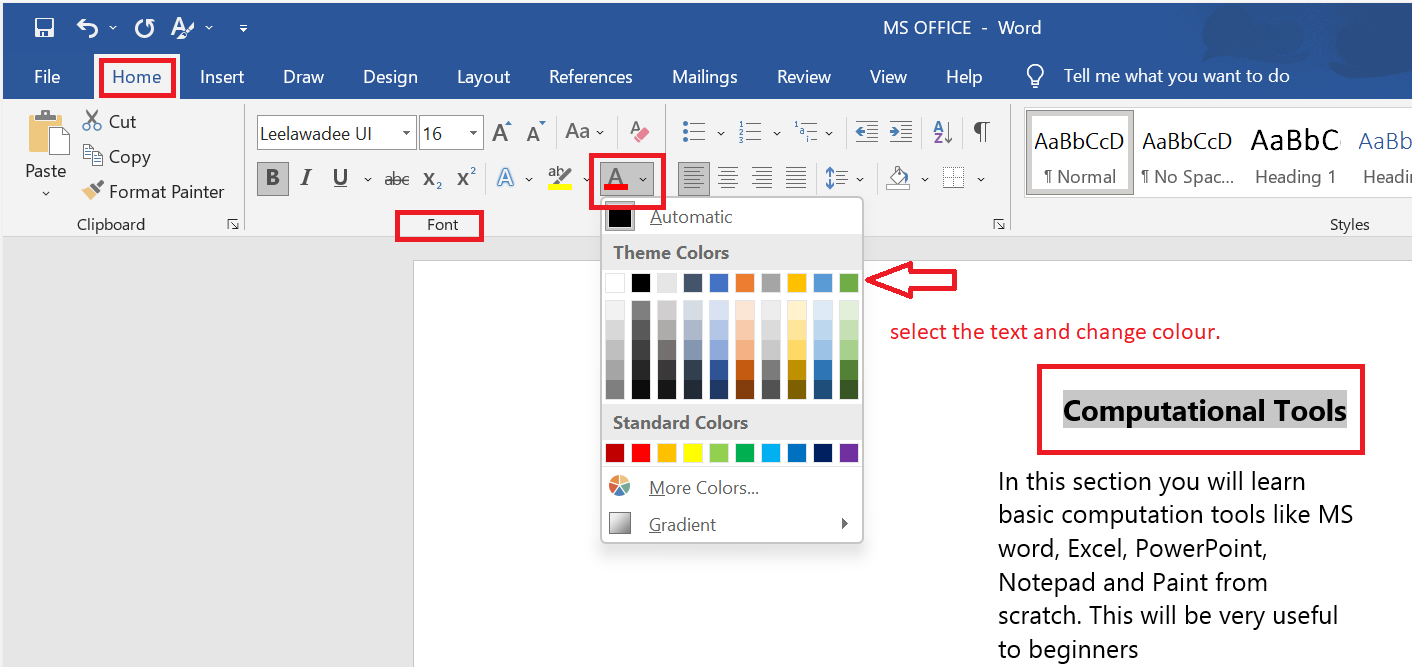
How to Change Font Colour
You can change the font colour of your text in the document by…
- Select the text you want to modify
- In Home tab you will find the Font group
- Click the drop-down arrow next to Font colour button
- Font colour menu appears
- Select the desired font colour with a left click
- Word will change the Font colour of the selected text.
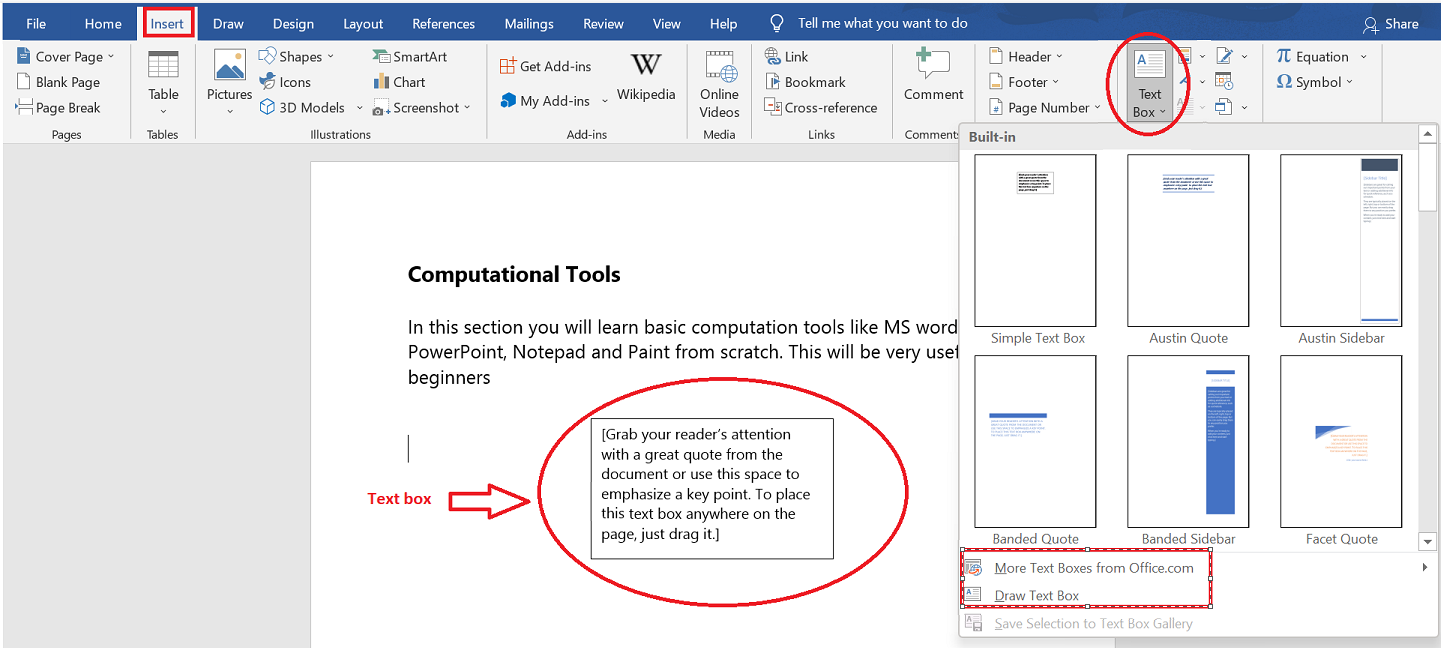
How to Insert a Text Box
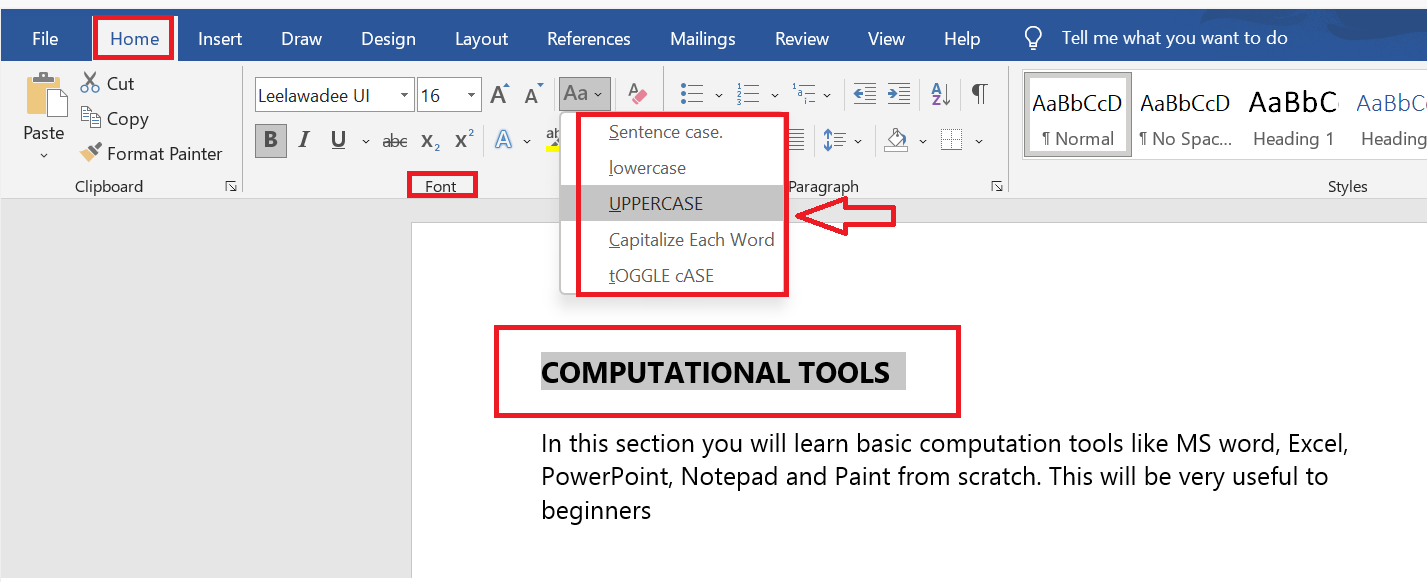
How to Change Text Case in MS Word
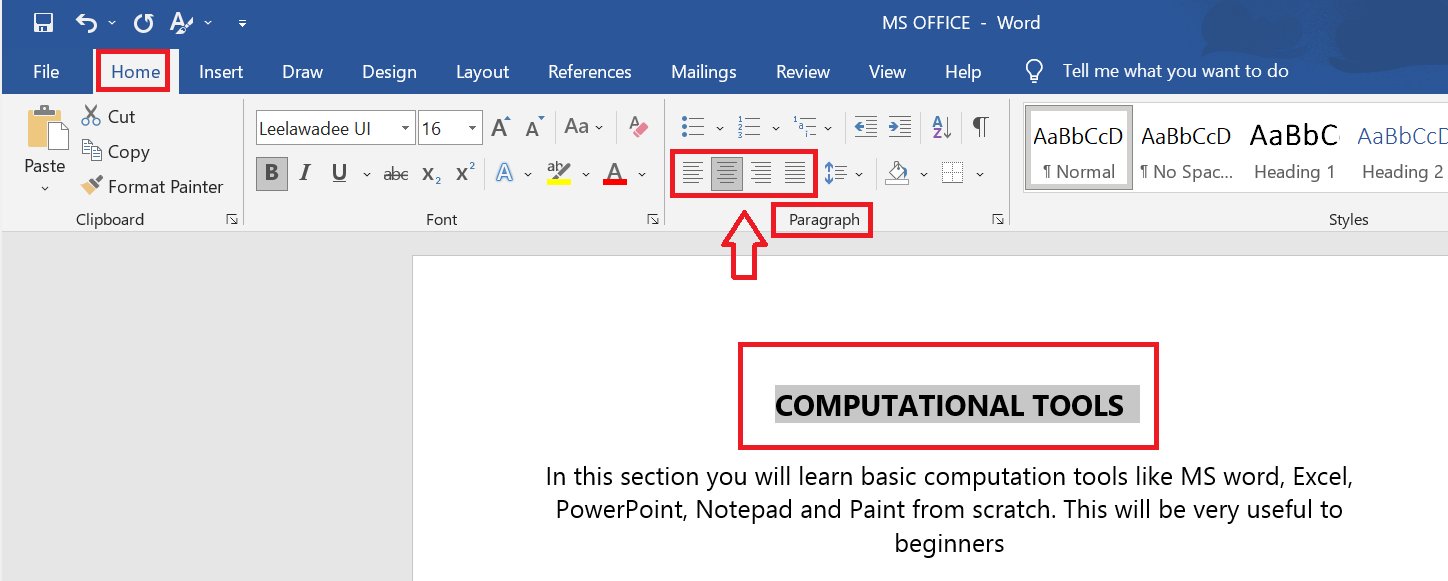
How to Change Text Alignment in MS Word
Bold, Italic and Underline Commands in MS Word
Lists
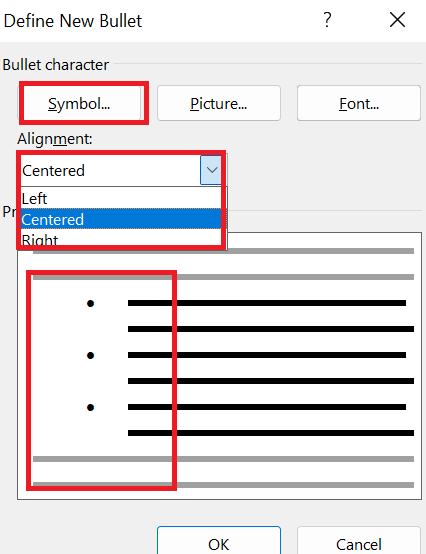
How to add bullets and numbers
Bullets and numbers are used to make a list more presentable and readable. Select the text you want to convert to bulleted or numbered list
- Select the Home tab
- In Paragraph group click the Bullets or Numbering command
- It displays Bullets or Numbering menu
- With a left click select the desired Bullet or Numbering style
- To increase the list place the cursor at the end of list and press Enter key

Layout
Page Layout
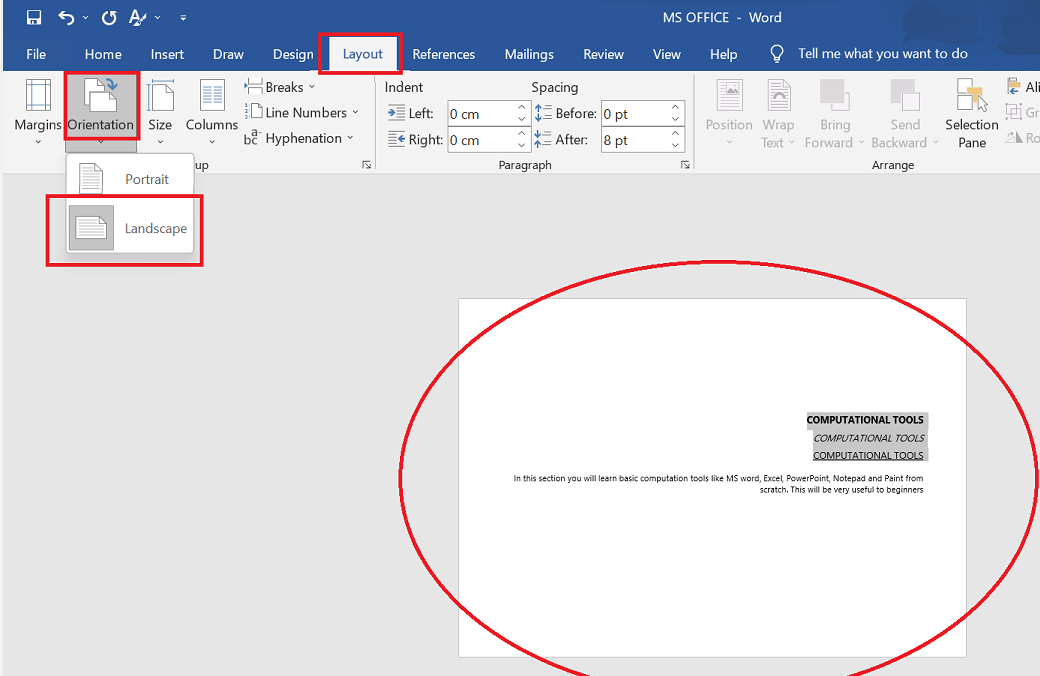
How to Change Page Orientation in MS Word
Page orientation is of two types; portrait (vertical) and landscape (horizontal). The default orientation is portrait; it can be changed to landscape by following these steps;
- Select the Page Layout tab
- Locate the Page Setup group
- In Page Setup group click the Orientation command
- It displays two options, Portrait and Landscape
- Select the desired page orientation
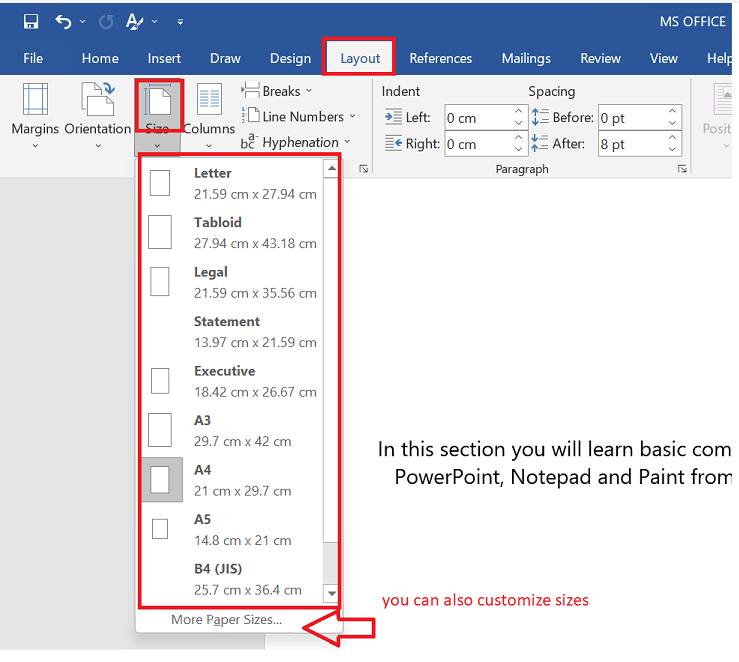
How to Change Page Size
The default paper size in Word is 8.5 x 11 inches. you can change page size of the document by…
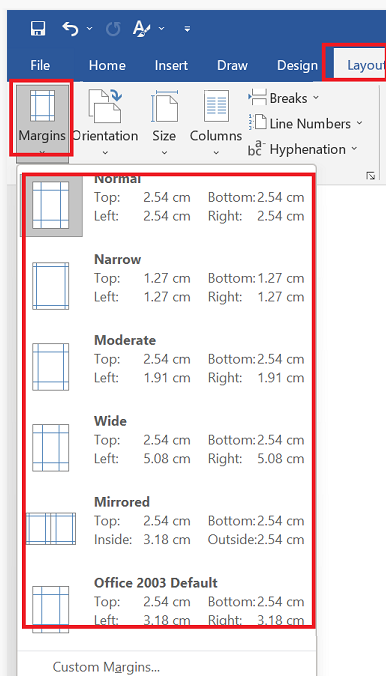
How to Change Page Margins
The margin is the space between the text and border of a document. By default, it is a one-inch space. Depending on your needs, it can be changed by following the below-listed steps;
- Select the Page Layout tab
- In Page Setup group click the Margins command
- A list of Margins appears
- Select the desired Margin with a left click
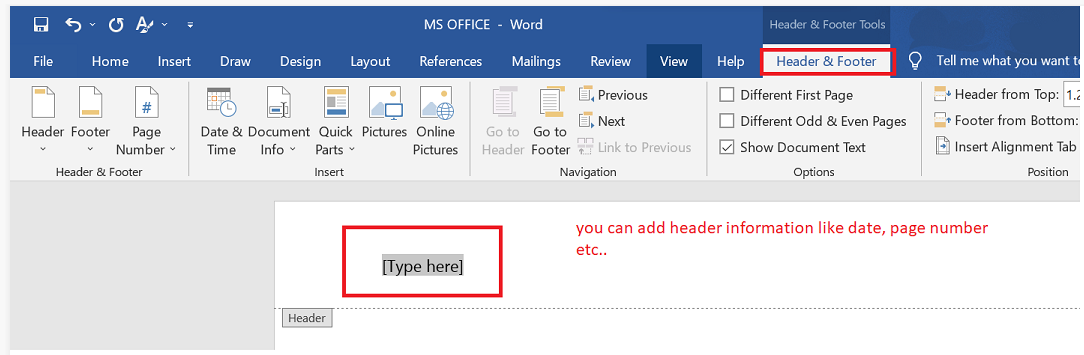
Headers and Footers
The header is a section of the document that appears in the top margin.
The footer is a section of the document that appears in the bottom margin.
Headers and footers are useful for including material that you want to appear on every page of a document such as your name, the title of the document, or page numbers. This tutorial explains how to insert headers and footers, how to have a different header on the first page, and how to create different headers in different sections.
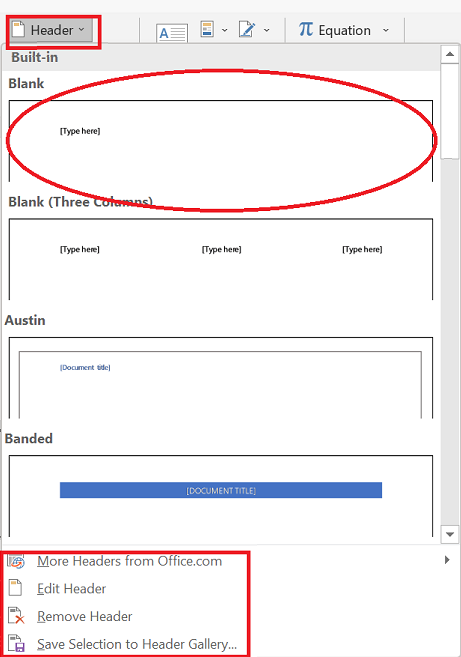
Inserting headers and footers

Clicking either of these icons will display a dropdown menu with several options.
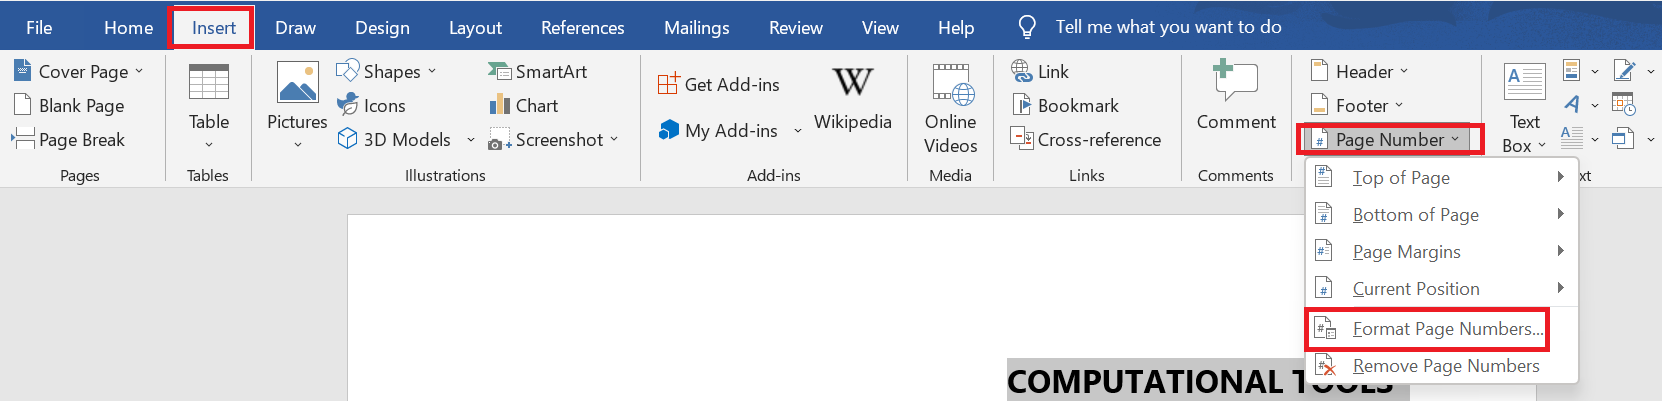
Page Numbers
Page numbers can be used to automatically number each page in your document. They come in a wide range of number formats and can be customized to suit your needs. Page numbers are usually placed in the header, footer, or side margin. When you need to number some pages differently, Word allows you to restart page numbering.
Word can automatically label each page with a page number and place it in a header, footer, or side margin. If you have an existing header or footer, it will be removed and replaced with the page number.
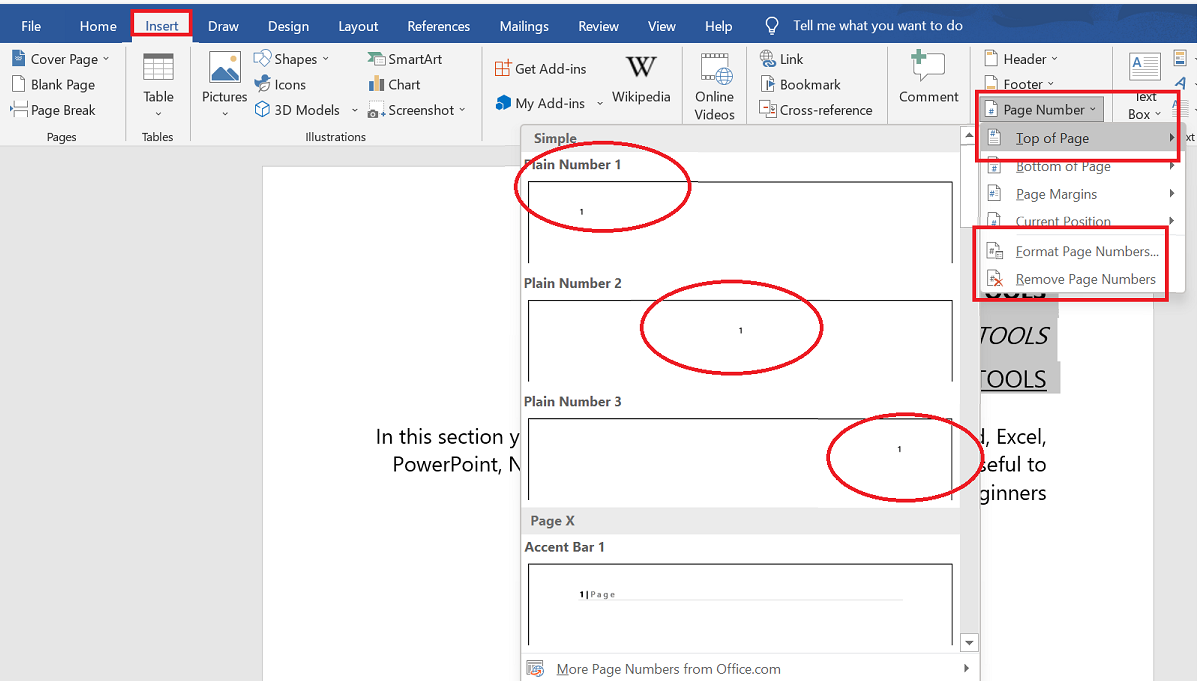
- On the Insert tab, click the Page Number command.
- Open the Top of Page, Bottom of Page, or Page Margins menu, depending on where you want the page number to be positioned, then select the desired style of header.
- Page numbering will appear.
Objects
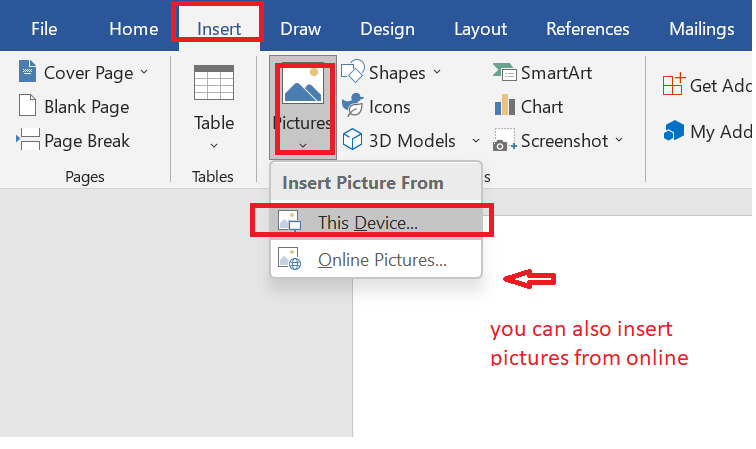
Adding Pictures
How to Insert Picture
You can insert pictures in your text by following these steps;
- Place the cursor where you want to insert the picture
- Select the Insert tab on Ribbon
- In Illustrations group click the Picture command;
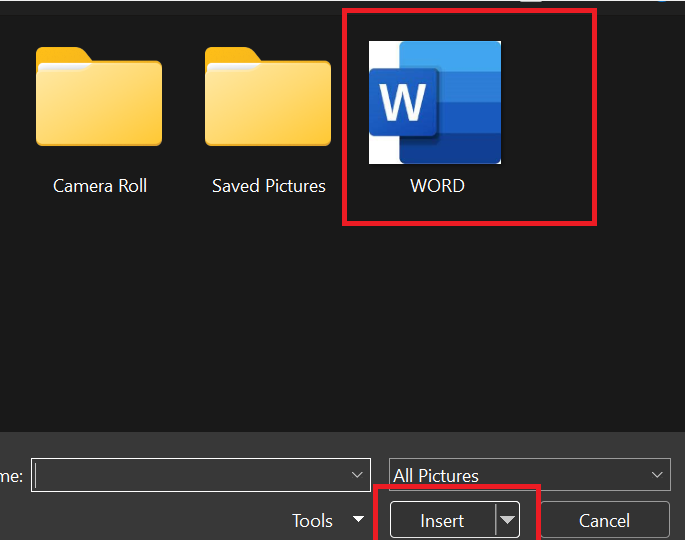
- It displays 'Insert Picture' dialog box
- Select the desired image
- Click Insert to insert the picture
Formatting Pictures
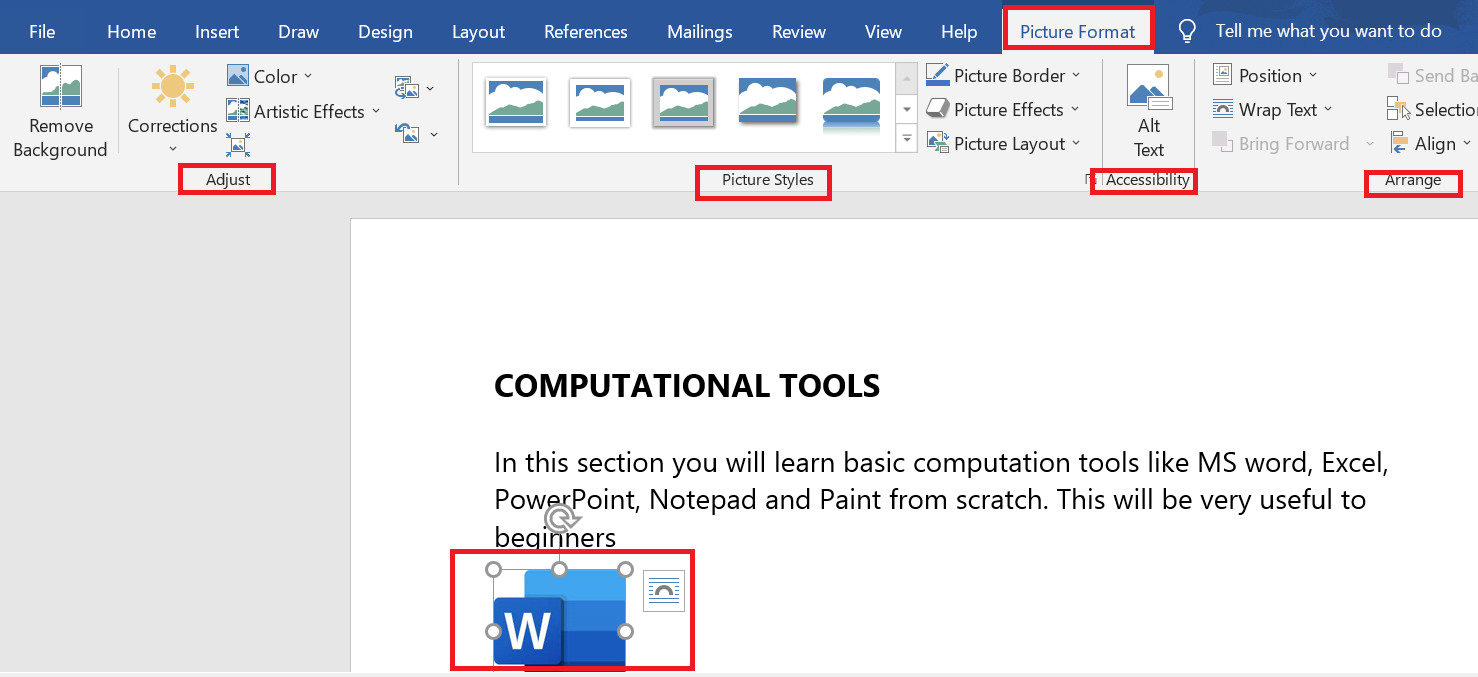
You can change the appearance of your picture or clip art to enhance its visual impact. The format tab offers you various options for formatting pictures like contrast, changing colour, line style, cropping, etc. The steps to format picture or clip art are given below;
- Select the picture or clip art that you want to format
- Format tab appears in the Ribbon
- Click the Format tab
- It displays four groups of related commands to modify or format picture or clip art.
Shapes
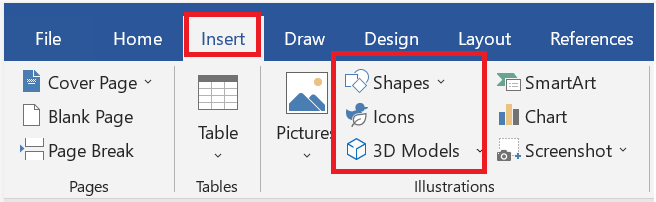
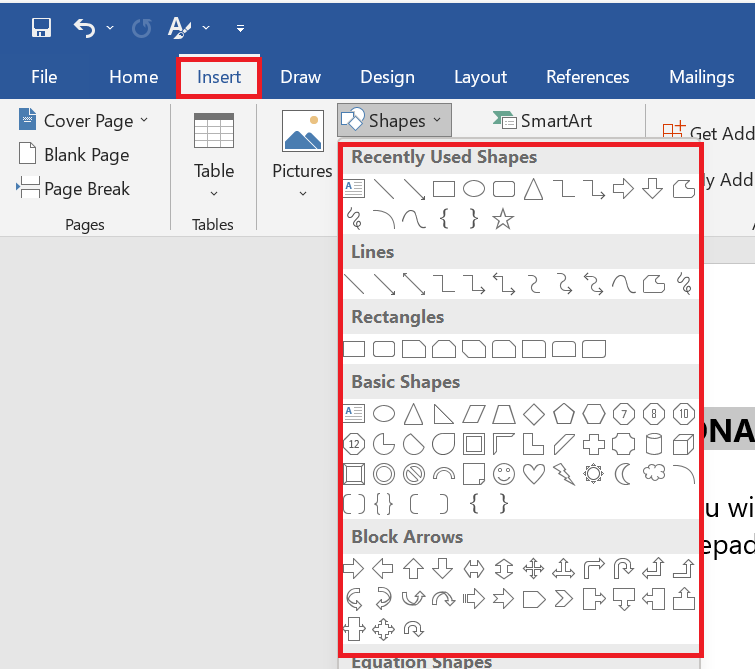
You can add a variety of shapes to your document, including arrows, callouts, squares, stars, and flowchart shapes. Want to set your name and address apart from the rest of your resume? Use a line. Need to create a diagram showing a timeline or process? Use flowchart shapes. While you may not need shapes in every document you create, they can add visual appeal and clarity.
- Select the Insert tab, then click the Shapes command. A drop-down menu of shapes will appear.
- Select the desired shape.
- Click and drag in the desired location to add the shape to your document.
Tables
How to Insert Table
Table is a versatile tool of MS Word. It allows you to organize your information, i.e. you can align text, present numerical data and create forms and calendar. The steps to insert table are given below;
- Place the cursor where you want to insert the table
- Select the Insert tab
- In Tables group click the Table command
- It displays different options to insert the table
- Select the desired option to insert the table

To Convert Text to Table
- Select the text
- Select the Insert tab
- In Tables group click the Table command
- Select the 'Convert Text to Table' option;
- It displays a dialog box
- In 'Separate text at' section select the desired option
- Click OK, the text will convert to a table

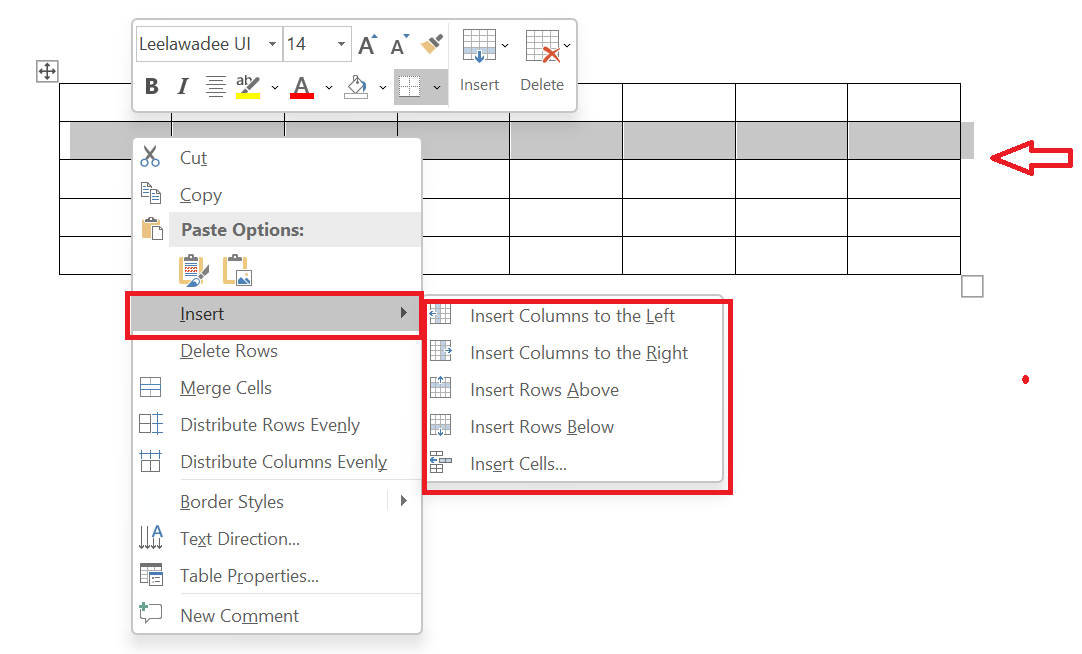
How to Add Row and Columns in Table
If you want to increase or add a new row or column in your table, you can follow the steps given below;
- Place the cursor in a row above or below which you want to add row
- Right click the mouse
- A menu appears
- Place the arrow over Insert option
- It will display a menu
- As required select 'Insert Rows Above' or 'Insert Rows Below'
- Similarly, you can add columns
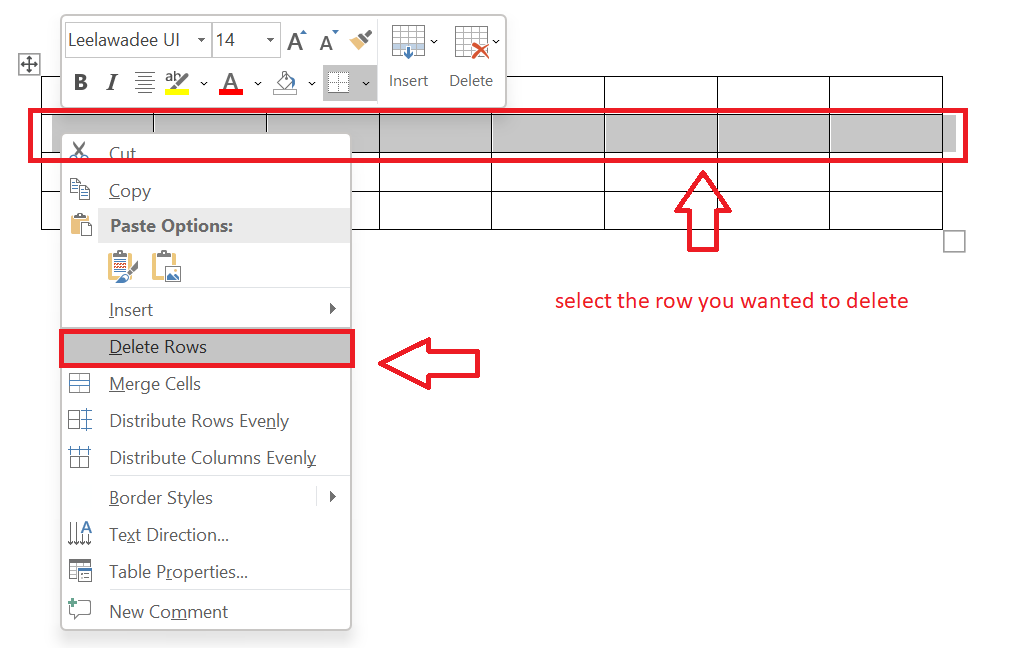
How to Delete Column or Row in Table
The table command also allows you to delete a column or row in your table. You can delete the unwanted columns or rows by following these steps;
- Select the column or row of the table
- Right click the mouse
- A menu appears
- As required select 'Delete Columns' or 'Delete Rows'
How to Modify Table
Word allows you to customize tables as per your requirement. You can modify your table in different ways, i.e.., you can choose a table style, table design, draw borders. The steps to modify a table are given below;
- Select the table
- Two new tabs Design and Layout appear on the Ribbon
- On Design tab you will see three groups of commands to modify table; Table Style Options, Table Styles and Draw Borders.
- Layout tab has six groups of commands to format table.


Quiz
You've learnt a lot of things.
Are you ready to take a small quiz?
Click the Download Notes button to download the study material for MS Word.